
How to Make Creamy Ice Cream Without a Machine (With Only 2 Ingredients)
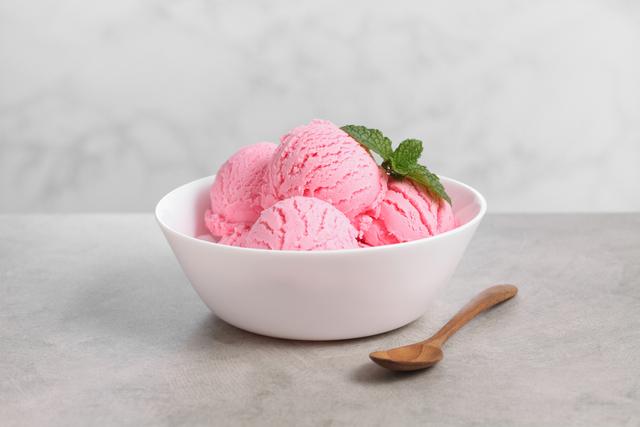
If you think homemade ice cream is only for chefs with fancy machines or complicated recipes, think again. Imagine scooping out rich, creamy ice cream—without even owning an ice cream maker or stocking up your pantry with exotic ingredients. Curious? Well, get ready: you're about to discover just how easy (and fun!) it is to impress your tastebuds, your friends, and yourself with only two humble ingredients.
The Unexpected Secret Behind Homemade Creaminess
Why does this work? Most people think you need churners, rock salt, or stabilizers to make ice cream. But the real magic comes from understanding what makes ice cream luscious in the first place—fat content and air. Our two hero ingredients? Sweetened condensed milk and heavy cream. When whipped together, they create a luxurious texture that truly rivals store-bought premium brands.
Still skeptical? Let me tell you about Paula—a self-proclaimed kitchen disaster—who hesitantly tried this recipe on a scorching summer day. She ended up with a freezer brimming with ice cream, and a family begging for seconds. If Paula (who once burned water) can master this, so can you.
Why This 2-Ingredient Recipe Wins Every Time
- Fuss-free: No churning. No machines. No ice baths. No fancy additives.
- Just two ingredients: Heavy cream and sweetened condensed milk. That’s it.
- Endless flavor options: Add anything you crave—chocolate, fruit, cookies, even a dash of cinnamon!
- Ultra creamy texture: Whipped cream brings the air; condensed milk brings the silkiness.
So, what are you waiting for? Let’s dive into the secrets you won’t find on the packaging.
The Simple Steps: How To Make 2-Ingredient Creamy Ice Cream
- Chill Your Tools: Pop your mixing bowl and beaters (or whisk) in the freezer for 15 minutes. It makes all the difference when whipping the cream.
- Whip Heavy Cream: Pour 500ml (about 2 cups) of heavy cream into your chilled bowl. Whip until you get stiff peaks—think clouds that stand tall but don’t look grainy.
- Fold in Sweetened Condensed Milk: Gently fold in one 397g can (about 14 ounces) of sweetened condensed milk. Take your time; you want to keep all the air you whipped in.
- Customize (Optional): At this point, swirl in your favorite add-ins: chocolate chips, vanilla extract, berry puree—you name it!
- Freeze: Pour into a loaf pan or freezer-safe container, cover with plastic wrap, and freeze for at least 6 hours (overnight is best).
- Scoop and Serve: For best scooping, let the container sit at room temp for 5 minutes before serving.
That’s it. No extra steps lurking in fine print. And the best part? Zero risk of kitchen chaos.
Tips from Real-World Ice Cream Success Stories
Now, you could stop here—but with these tested tricks from fellow home cooks, your ice cream will be legendary:
- Experiment with textures: Swirl in caramel, peanut butter, or Nutella ribbons before freezing for dramatic layers.
- Go wild with mix-ins: Fold in crushed cookies, roasted nuts, or candy just before freezing for extra crunch.
- Brighten flavors: A teaspoon of lemon zest, matcha powder, or a hint of espresso powder adds depth and surprise.
- Dairy alternative? Coconut cream and sweetened coconut condensed milk make an incredible vegan base.
Let me share a personal story: I once brought a batch of homemade pistachio-chunk ice cream (with just chopped pistachios added) to a family barbecue. No one could believe it wasn’t store-bought—yet it was devoured before dessert was officially announced!
Avoiding Common Mistakes (So Yours Turns Out Perfect!)
Every great recipe has a few chances for things to go sideways. But don’t worry, here’s how to sidestep the biggest ice cream slip-ups:
- Don’t overwhip: If your cream turns to butter, the ice cream will be greasy. Stop as soon as stiff peaks form.
- Fold, don’t mix: Over-mixing deflates the whipped cream and gives you a dense result. Use a spatula and gentle movements.
- Don’t skimp on freezing: Tempted to taste it early? Be patient! At least 6 hours delivers the perfect scoop.
- Choose quality ingredients: Your flavor and texture depend on rich, real heavy cream and reliable condensed milk.
Ever wondered why homemade ice cream sometimes forms ice crystals? That usually comes from low-fat ingredients. So, embrace the real stuff for truly creamy results.
Give It Your Signature Twist: 5 Irresistible Variations
Ready to channel your inner ice cream artist? Here are a few combinations guaranteed to wow:
- Strawberry Delight: Swirl in diced fresh strawberries or a quick homemade strawberry jam (just berries and sugar, simmered down).
- Cookies & Cream Classic: Fold in a handful of crushed chocolate sandwich cookies right before freezing.
- Chocolate Hazelnut Fantasy: Swirl in a generous spoonful of Nutella and sprinkle with chopped hazelnuts.
- Salted Caramel Dream: Drizzle homemade (or store-bought) salted caramel between layers as you pour the mix into your container.
- Coffeehouse Treat: Mix in a tablespoon of instant espresso powder and a handful of chocolate chips for mocha glory.
Pro tip: Let the kids lead the flavor experiments! Setting up an “ice cream creation station” has become a summer tradition for many families I know.
Frequently Asked Questions (And the Honest Answers!)
You’re probably still wondering…
Will it taste as good as churned ice cream?
Answer: You’d be shocked! While the texture is slightly different, it’s creamy, rich, and utterly satisfying.
Can I use light cream or evaporated milk?
Answer: For best results, stick to high-fat cream and sweetened condensed milk. Lower fat means less creaminess and possible icy texture.
How long can I store it?
Answer: Homemade ice cream keeps beautifully in a sealed container for up to 2 weeks. But odds are it’ll be gone long before then!
Why You’ll Want to Share This Recipe Again and Again
Imagine the next birthday, picnic, or lazy Saturday—surprising everyone with a scoop (or three!) of homemade happiness. The best part? You mastered a show-stopping dessert with no special gadgets and only two simple ingredients.
Go ahead, start your own tradition. Make it once, and you’ll never look at store-bought pints the same way again. Your kitchen is now your personal ice cream parlor—and just like Paula, you’ll find yourself grinning every time you open the freezer.
Ready to upgrade everything you know about dessert? Try this recipe tonight. Invite friends. Take photos. Experiment with wild flavors. And most importantly—enjoy every creamy, homemade bite.