
Yogurt Tiramisu Recipe: How to Make Biscoff Layers
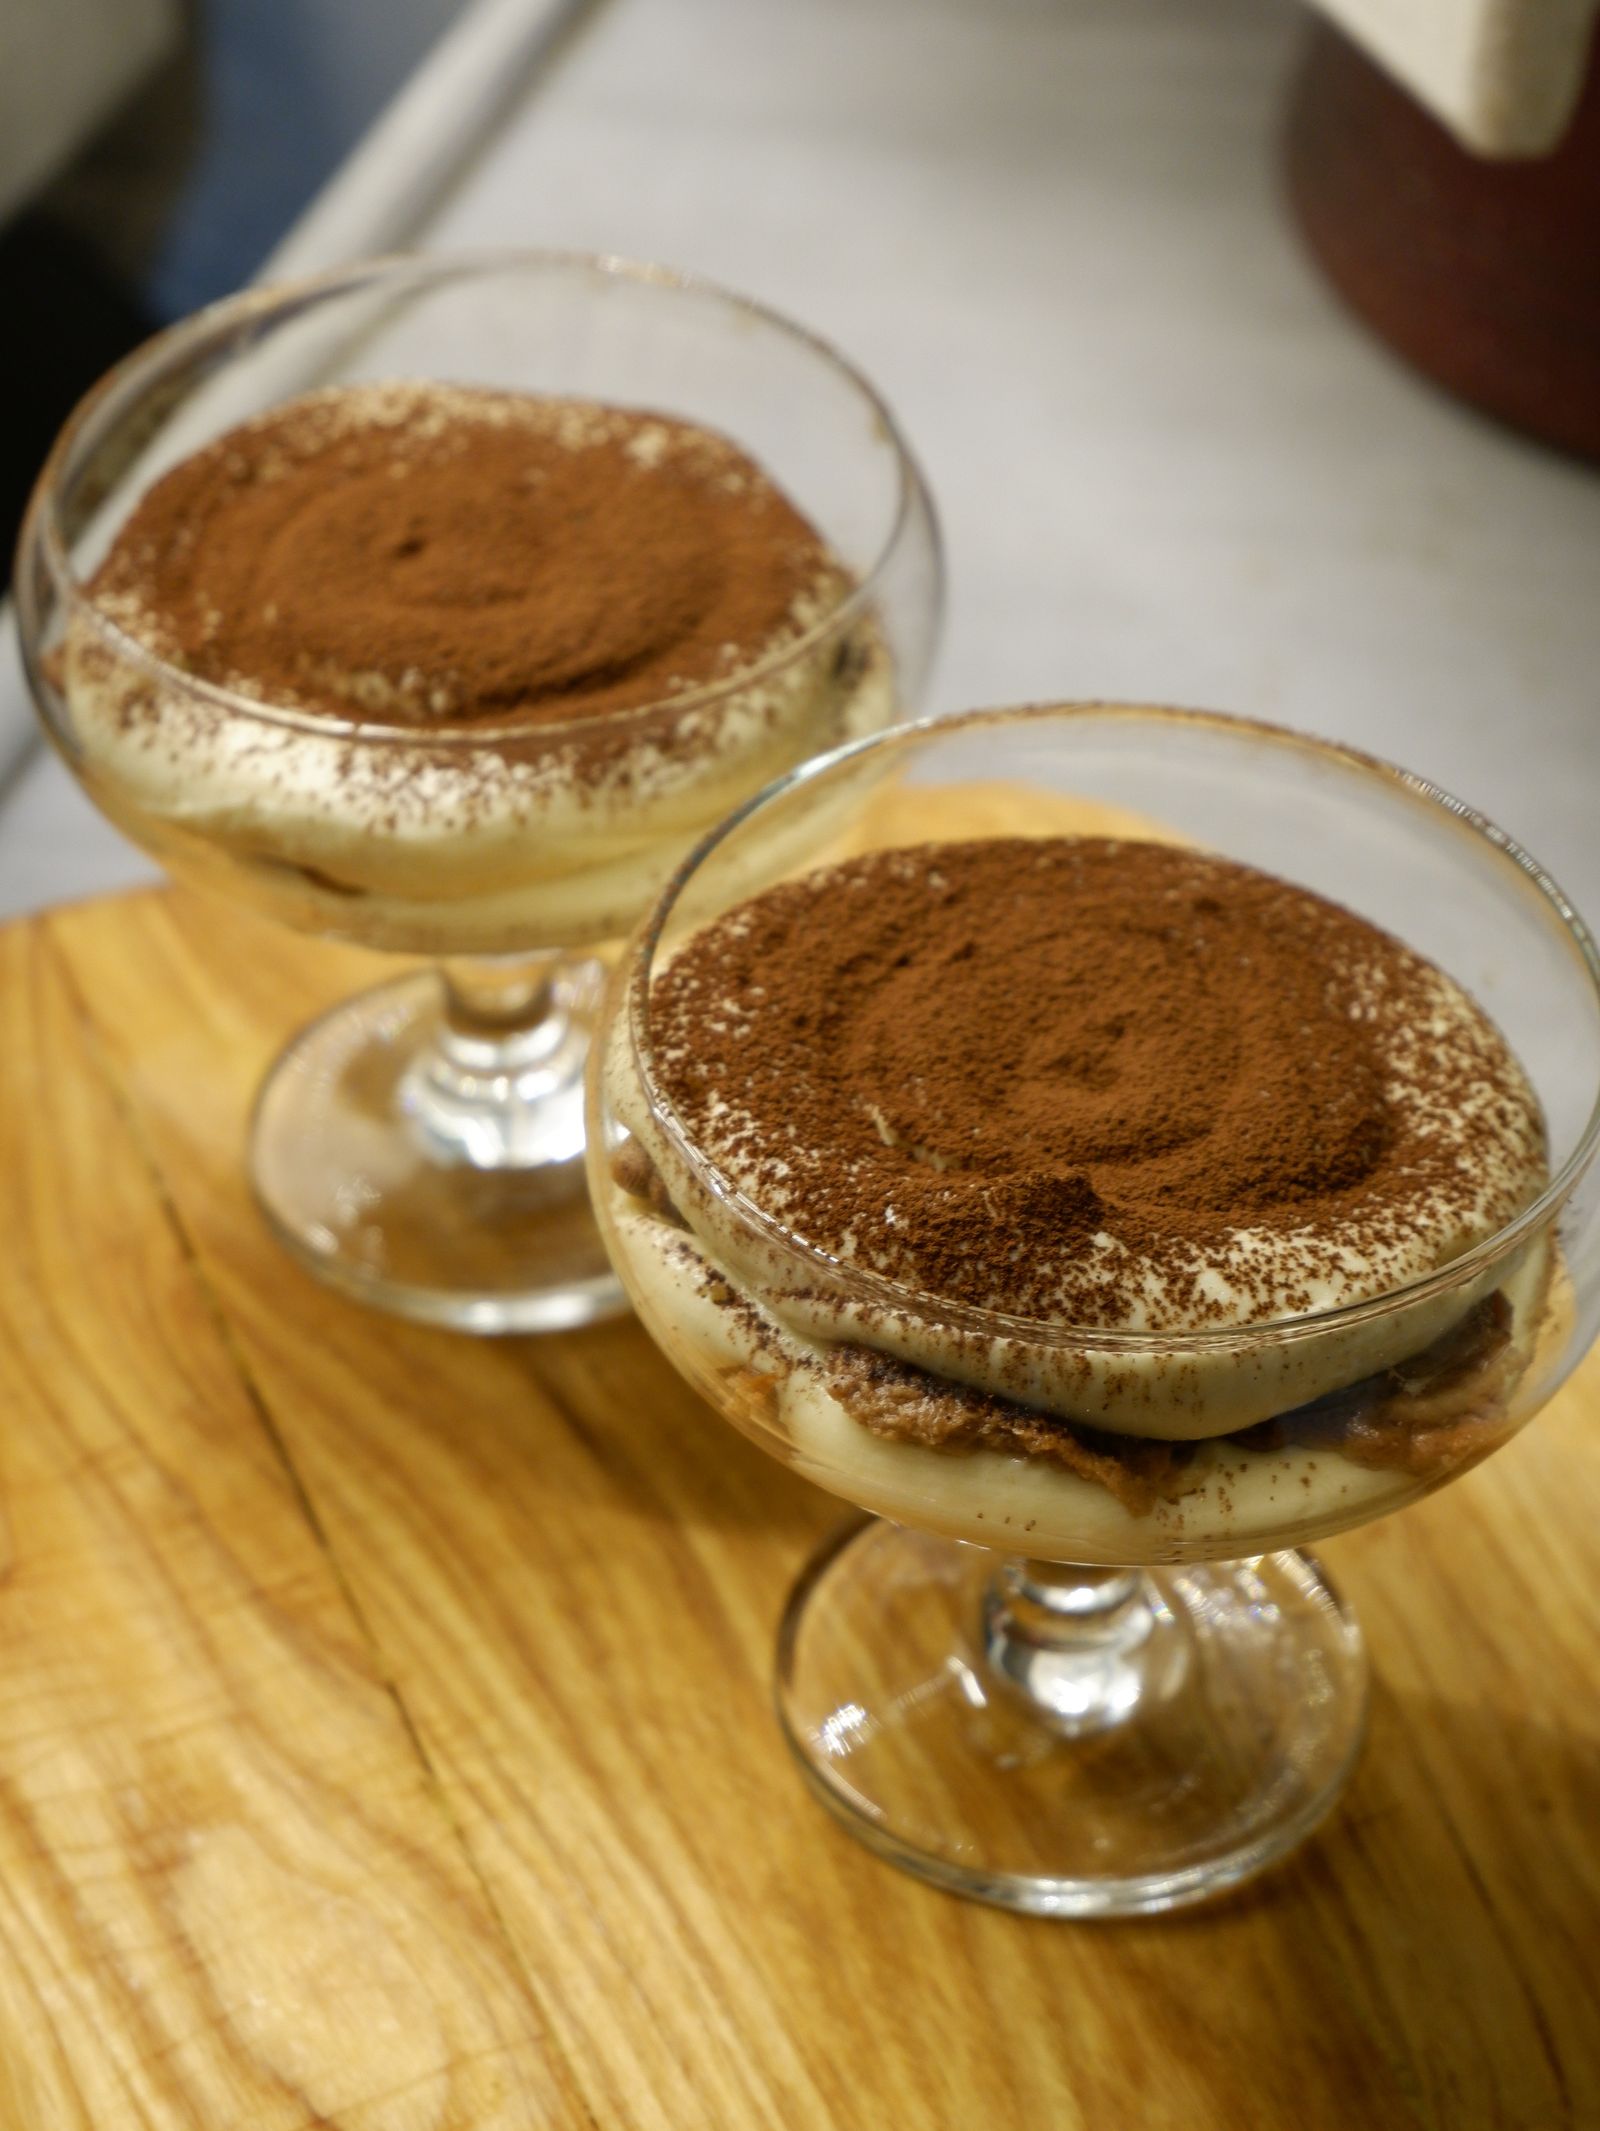
Yoghurt Tiramisu Recipe
A quick FAGE demo of a lighter tiramisu made with Greek yogurt instead of mascarpone.
The spoon breaks through a dusting of cocoa, slides into cool cream, and comes back with a soft, coffee-soaked Biscoff biscuit. It looks like a dessert that required whipping, folding, and a small mountain of dishes. Then comes the pleasant surprise: the filling is mostly yogurt.
This yogurt tiramisu recipe takes the appeal of the viral Biscoff-and-yogurt dessert and gives it a little more structure: gently sweetened yogurt, caramelized biscuits, coffee, and enough chilling time to bring everything together. No mascarpone, no raw eggs, no oven.
Picture assembling it after dinner, sliding it into the fridge, and discovering tomorrow that a few ordinary ingredients have become something worth serving in your nicest little glasses. That is the real attraction here. The refrigerator does most of the work.
There is one important expectation to set: this is tiramisu-inspired, not traditional Italian tiramisu. Yogurt brings a fresh tang instead of mascarpone's buttery richness. Choose the right yogurt and control the moisture, however, and those differences become part of its charm.
1. Why Biscoff and Yogurt Make Such a Good Match
Classic tiramisu builds contrast through coffee, cocoa, soft biscuits, and a rich mascarpone filling. This easy Biscoff dessert follows the same general idea, but changes the balance. The biscuits bring caramelized sweetness and warm spice; the yogurt adds acidity; the coffee stops each spoonful from tasting too sweet.
That contrast matters more than loading the filling with sugar. Think about cheesecake: the slight tang is not an obstacle to dessert. It is one of the reasons you want another bite.
What the refrigerator actually does
During chilling, the biscuits absorb moisture from both the coffee and the yogurt. Their crisp texture softens into something closer to a delicate cake layer. Meanwhile, the flavors mingle, so the filling tastes less like separate spoonfuls of yogurt and cookie spread.
This explains why a freshly assembled dish can seem unimpressive, while the same dish several hours later feels like a proper dessert. Chilling is part of the recipe, not merely a serving suggestion.
Is yogurt tiramisu really lighter?
It can be, particularly when plain Greek yogurt replaces a filling made with substantial amounts of mascarpone and cream. But “lighter” is a comparison, not a promise that every version is low in calories. Biscoff biscuits and cookie spread still contribute sugar and fat, and portion size still matters.
- Potential advantages: less richness, straightforward preparation, no raw eggs, and a filling that can provide more protein depending on the yogurt.
- Trade-offs: a tangier flavor, a softer set, and less of the luxurious mouthfeel associated with mascarpone.
- The practical takeaway: make it because you enjoy a fresher, creamy dessert, rather than expecting an exact replica of the original.
The layered Biscoff-and-yogurt format is popular for good reason: it is approachable. This version adds coffee and cocoa for a more recognizable tiramisu character without making the method complicated.
2. Ingredients: Buy for Texture, Not Just the Label
This recipe makes 6 modest servings. Use a small, deep dish approximately 15 × 20 cm, with a capacity of about 1.2 liters, or six individual glasses of roughly 180–200 ml each. Dish dimensions need not be exact; they simply change the thickness of the layers.
For the yogurt filling
- 600 g thick plain Greek yogurt: preferably around 2–5% fat for a balance of creaminess and freshness.
- 60 g smooth Biscoff spread: stirred until easy to mix.
- 20 g maple syrup or honey: optional, and adjustable after tasting.
- 1 teaspoon vanilla extract.
- A small pinch of salt: enough to round out the sweetness, not make the filling salty.
For the biscuit layers and finish
- 200 g Biscoff biscuits: reserve about 15 g from this amount for a crunchy topping.
- 120 ml strong brewed coffee or diluted espresso: cooled completely; you may not use all of it.
- 1–2 teaspoons unsweetened cocoa powder: for dusting just before serving.
Timing: about 15–20 minutes of active preparation, plus at least 6 hours in the refrigerator. An 8–12-hour overnight chill generally gives more even biscuit softening. Allow additional time if your yogurt needs straining.
The most important purchase: thick yogurt
Look for plain, unsweetened yogurt that holds a mound on a spoon rather than pouring like a drink. Greek yogurt is usually a useful starting point, but brand textures vary. “Greek-style” alone does not guarantee the consistency you need.
Check the ingredient list, nutrition label, and any visible whey before buying or using it. A higher protein content can be a helpful clue that a yogurt is concentrated, but the actual texture matters most. Sweetened vanilla yogurt can work, although it gives you less control over the finished sweetness.
If your yogurt looks loose, strain it in a fine sieve lined with a clean cheesecloth or a suitable food-safe filter. Set the sieve over a bowl, cover, and refrigerate for 1–3 hours, or until visibly thicker. Weigh out 600 g after straining, so begin with more than the recipe quantity.
What about fat-free yogurt?
Thick fat-free Greek yogurt can work, especially in individual glasses. Expect a sharper flavor and a less rounded mouthfeel. A 2–5% yogurt is often the easier option when you want dessert-like creaminess without returning to mascarpone.
Also check biscuit and spread labels for allergens and dietary requirements. Standard Biscoff biscuits contain wheat, and this recipe contains dairy through the yogurt. Formulations and allergen statements can differ by product and region.
3. How to Make Yogurt Tiramisu, Step by Step
Before starting, clear a little space in the refrigerator and set out your dish, a mixing bowl, a spoon or spatula, and a shallow bowl for the coffee. Small preparation, noticeably smoother assembly.
Step 1: Brew the coffee and cool it completely
Make 120 ml of strong coffee, then let it cool before it touches the biscuits or filling. Warm coffee can soften the biscuits too quickly and warm the yogurt unnecessarily. For faster cooling, transfer the coffee to a shallow heat-safe bowl.
You want a recognizable coffee flavor, but not necessarily an aggressively bitter one. If using espresso, dilute it with a little water to suit your taste. Decaffeinated coffee works just as well for the structure of the dessert.
Step 2: Mix a smooth, gently sweet filling
Stir the Biscoff spread until soft. If it is too stiff to combine easily, warm it briefly according to your appliance's instructions, then let it return to room temperature. It should be soft, not hot.
Mix the spread with two or three spoonfuls of yogurt first. Once smooth, fold or gently stir in the remaining yogurt, vanilla, salt, and optional maple syrup or honey. There is no need to whip air into the mixture.
Taste before adding more sweetener. The biscuits will contribute plenty of sweetness once assembled. A filling that tastes gently tangy now often feels beautifully balanced after chilling.
Step 3: Add a thin base of filling
Spread a few spoonfuls of filling across the bottom of your dish. This helps hold the first biscuit layer in place. Keep it thin: most of the filling belongs between the layers and on top.
Step 4: Moisten the biscuits without soaking them
Give each biscuit one very quick dip in the cooled coffee, then lift it out immediately. Do not hold it under the liquid or wait for it to feel soft. Biscoff biscuits are relatively thin and continue absorbing moisture in the refrigerator.
If your first biscuit starts collapsing, switch to brushing or lightly spooning coffee onto the remaining biscuits. A barely moistened biscuit is safer than a saturated one. Leaving some coffee behind is normal; the full amount is there to make dipping convenient.
Arrange roughly half the layering biscuits over the thin yogurt base. Break a few to fill larger gaps, but do not worry about creating a perfectly tiled floor.
Step 5: Repeat the layers
Spread approximately half the remaining filling over the biscuits. Add a second layer of briefly dipped biscuits, then finish with the rest of the yogurt mixture. Smooth the top gently without pressing down hard.
For individual glasses, follow the same sequence, breaking the biscuits into pieces that fit. Distribute the ingredients evenly among six glasses, keeping the reserved topping crumbs separate.
Step 6: Cover and refrigerate
Cover the dish and chill for at least 6 hours, preferably overnight. Keep the reserved biscuits dry in an airtight container at room temperature. Avoid disturbing the dessert during the first few hours; the layers need time to soften and settle.
Step 7: Finish just before serving
Dust the surface with cocoa through a small sieve. Crush the reserved biscuits and sprinkle them over the top immediately before serving. The cocoa adds a slightly bitter finish, while the fresh crumbs restore a little crunch.
Serve with a large spoon rather than expecting perfectly sharp slices. This recipe is designed to be soft and scoopable. If neat presentation matters, individual glasses are the easiest solution.
4. The Small Choices That Prevent a Watery Dessert
Most disappointing yogurt tiramisu has one thing in common: too much free liquid. It might come from thin yogurt, a long coffee soak, or fruit added without draining. The solution is not necessarily more ingredients. It is better moisture control.
Build thickness before assembly
If the filling runs off your spoon, stop and assess it before layering. Chilling will soften the biscuits, but it will not magically turn thin yogurt into mascarpone. Straining the yogurt beforehand is much more effective than hoping the biscuits absorb all the extra liquid.
A useful test: drag a spoon through the finished filling. It should leave a trail briefly before slowly settling. This is a practical kitchen cue, not an exact measurement, but it helps catch an obviously loose mixture.
Think of coffee as seasoning, not a bath
The biscuits already receive moisture from the yogurt. Coffee adds flavor and starts the softening process; it does not need to saturate them.
For example, if you are using a slightly softer yogurt despite straining, brushing the biscuits with coffee gives you more control than dipping. With very thick yogurt, a quick dip is usually straightforward.
Keep the topping separate
Cocoa added the night before will absorb moisture and darken. That is not necessarily a problem, but the finish looks fresher when dusted at serving time. Biscuit crumbs are less forgiving: they lose their crunch quickly on a wet surface.
- Watery filling: use thicker yogurt or strain it longer next time; serve the current batch in bowls or glasses.
- Mushy biscuit layers: reduce the coffee contact time and avoid pressing down during assembly.
- Dry centers after chilling: give the dessert more time; next time, moisten the biscuits a little more evenly.
- Too tangy: stir a little extra sweetener into the filling before assembly, or choose a milder yogurt next time.
- Too sweet: omit the optional syrup and use unsweetened coffee and cocoa.
One useful perspective: the best version is not the one with the thickest possible filling or the wettest possible biscuits. It is the one where the two meet halfway during chilling.
5. Easy Variations Without Losing the Balance
Once the basic version works for you, make changes one at a time. Swapping yogurt, biscuits, sweetener, and dipping liquid simultaneously makes it difficult to know why the texture changed.
A coffee-free Biscoff yogurt dessert
Replace the coffee with cooled, unsweetened milk or a suitable plant-based drink. Brush it onto the biscuits rather than soaking them. You will lose the coffee bitterness, so consider omitting the optional syrup to keep the sweetness balanced.
This version is less tiramisu-like but still delicious. For a chocolate direction, whisk a little unsweetened cocoa into warm milk, cool it completely, and use that as the moistening liquid.
A higher-protein version
Choose a thick Greek yogurt or skyr with a protein content that suits your preferences. Skyr can be firmer and tangier, so taste the filling before deciding on sweetener. Nutrition will vary by brand and serving size.
There is no need to add protein powder automatically. Some powders make yogurt grainy, chalky, or unexpectedly thick after refrigeration. If you want to experiment, test a small portion of filling first rather than risking the whole dish.
A less-sweet, simpler version
Omit both the syrup and the Biscoff spread, keeping the yogurt, vanilla, biscuits, coffee, and cocoa. The filling will taste more distinctly like yogurt, while the biscuit layers still provide caramelized sweetness.
This variation also illustrates an important point: cookie spread adds richness and flavor, but it is not the ingredient that holds the dessert together. Thick yogurt and patient chilling do that work.
A dairy-free version
Use a thick, spoonable dairy-free yogurt that you already enjoy eating plain. A Greek-style soy yogurt or a firm coconut-based yogurt may work, but texture and protein content vary widely. Check the biscuits and spread as well rather than assuming every product is suitable.
If the yogurt pours easily, strain it if appropriate for that product or choose a thicker alternative. Serve the first attempt in glasses, where a softer set is less troublesome. Coconut-based yogurt may also introduce a noticeable coconut flavor.
Want to add berries?
Add a few dry, fresh berries at serving time instead of mixing juicy fruit into the filling. Thawed frozen berries can release enough liquid to loosen the layers, so drain them thoroughly and serve separately if using them.
Likewise, a small drizzle of extra spread can look lovely, but it is optional. The dessert already has plenty of Biscoff character without a thick layer of spread covering the top.
6. Make-Ahead Timing, Storage, and Serving
This is a genuinely useful make-ahead dessert because resting improves it. Assemble it the evening before lunch with friends, or prepare six glasses while clearing up dinner. The next day, your only jobs are cocoa, crumbs, and spoons.
The best serving window
For the most balanced texture, aim to serve it after an overnight chill and within about 24–48 hours of assembly. Keep it covered in a refrigerator at 4°C / 40°F or below, and use it within 3 days, or sooner if the yogurt's storage guidance requires it.
The biscuits become progressively softer, so day three may taste pleasant but have less distinct layers. Use clean utensils when serving, and return leftovers to the refrigerator promptly.
Do not leave this dairy-based dessert at room temperature for more than 2 hours in total, or more than 1 hour when the temperature is above 32°C / 90°F. For outdoor gatherings, keep it chilled until serving.
Can you freeze it?
Freezing is not the best option for this particular recipe. Yogurt can separate or become grainy after thawing, and the biscuits may become overly soft. For predictable results, make a smaller batch rather than freezing leftovers.
Scaling it without guesswork
For three servings, halve every ingredient and use three glasses or a smaller container. For twelve, double the ingredients and use two similar-sized dishes rather than one very deep bowl. Consistent layer depth makes assembly and serving easier.
If transporting it, keep the dish upright in a chilled insulated bag with ice packs. Bring the cocoa and crumbs separately, then finish the dessert at your destination. That tiny extra step makes it look freshly prepared.
7. Your Questions Answered Before the First Spoonful
Can I use regular yogurt instead of Greek yogurt?
Yes, provided you strain it until thick enough. Ordinary unstrained yogurt is more likely to produce a loose dessert. Start with more than 600 g, because some weight will drain away as whey, and measure the required amount afterward.
Does this taste exactly like classic tiramisu?
No. It shares the coffee, cocoa, creaminess, and softened biscuit layers, but yogurt is tangier than mascarpone and Biscoff tastes different from ladyfingers. Think of it as its own dessert with a familiar tiramisu structure.
Can I eat it after only an hour?
You can, but the layers will not have developed the intended texture. Expect firmer biscuit centers and a filling that tastes more separate from the cookies. If you need a dessert immediately, serve yogurt cream with crushed Biscoff as a parfait and skip the expectation of softened tiramisu layers.
Do I need gelatin, cream, or a mixer?
No. This version needs none of them. Its structure comes from thick yogurt, layered biscuits, and refrigeration. It will remain spoonable rather than setting into a firm, sliceable cake.
How do I calculate the calories?
Use the labels on your yogurt, biscuits, spread, and sweetener. Add the calories for the amounts actually used, then divide by six for equal servings. Include any extra topping or drizzle. A single fixed figure would be misleading because yogurt fat levels and optional additions vary.
The easiest way to make it your own
Make the recipe once as written, then note just three things: was the filling sweet enough, were the biscuits too soft or too firm, and did you want more coffee? Those answers tell you exactly what to adjust next time.
You do not need professional equipment or mascarpone to make a dessert people linger over. You need thick yogurt, a light hand with the coffee, and the patience to let the layers settle.
Mix it tonight, finish it tomorrow, and let that first cool, creamy spoonful reward the small effort. Sometimes the most useful recipe is not the most elaborate one. It is the one you can happily imagine making again next week.